If you are working on unstretched canvas, and you want to be able to stretch it when finished if it comes out good, leave at least 2 inches all around the finished face of the canvas. The easy way to do this is to take a stretched canvas (or a pair of stretchers) and mark the profile of the artwork on the piece of canvas you will be using.
 When you have an image that you want to stretch, you will need a heavy duty stapler, a pair of canvas pliers (not absolutely necessary for a small canvas if you have strong fingers but it does make things easier) and a pair of stretchers. Make sure that the stretchers are absolutely square, using a T-square or just putting the assembled pieces into a frame to ensure that they are all at right angles. You can put a couple of staples through each corner to ensure that they stay true. Nothing is more discouraging than to complete your stretching project only to discover that it's not a regular rectangle but some sort of wierd parallelogram.
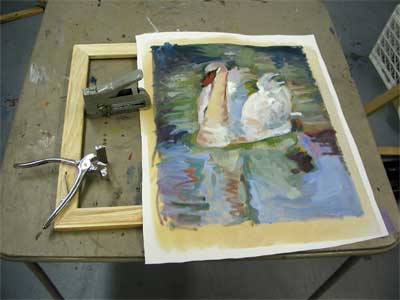
Start the process of stretching by positioning the image on the stretchers and then putting a staple in the middle point of each side (as shown). Note: the traditional method was to use tacks. Staples have replaced them since they are easier. If you choose to use tacks, use the copper tacks. They don't rust.
Don't pull the canvas "too" tight. You don't want to break the paint film by straining it. Just make sure that it's taut in the middle.
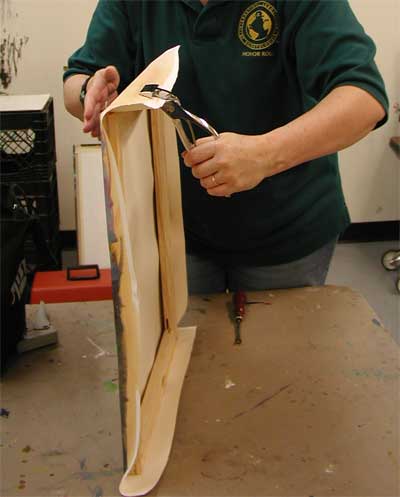
Once the 4 sides have one tack and you have ascertained that the image is not askew, begin to move out from the middle on all sides in turn, putting a tack on each side of the middle tack on first one side, then the other, then the two opposing sides. There's no particular science to this. Just make sure, as you go along, that you are keeping the canvas taut in the middle.

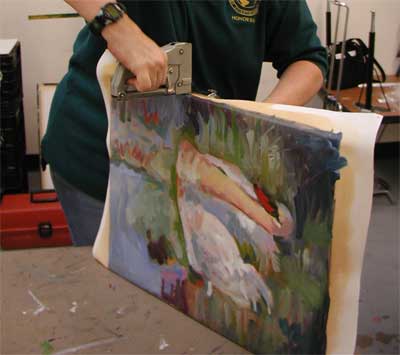 At the corners, make a neat flat tuck and staple in position.
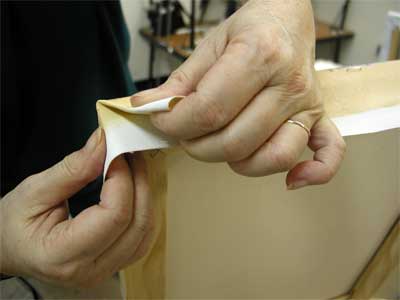 Finally, pull the excess canvas around to the back of the stretcher and staple in position. (Note: you'll find that many of the commercial stretched canvases cut off the excess canvas. I don't recommend this because it makes re-stretching (should you ever need to do that) difficult. The "better" commercially available canvases have begun turning and tacking the excess canvas.
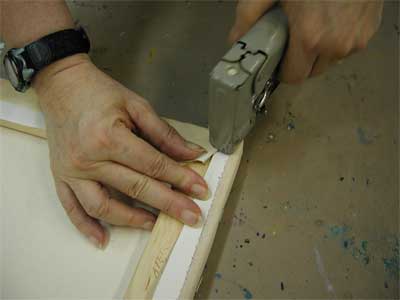
As a last note, many commercial canvases now being marketed are called "gallery style" canvases and don't have any staples on the sides. The canvas is wrapped around the side with no staples and tucked in the stretchers at the back. This is in keeping with the popular push to paint the sides of a canvas and omit the use of a frame entirely. I don't know how to either prepare this kind of stretched canvas or to unstretch it if I wanted to. Being old and conservative (yes, finally I admit it!), I tend to avoid this and pay for frames. A good reasonable source for frames is Graphik Dimensions, whose on-line store is called pictureframes.com. They include a range of prices. While you can buy online, I recommend sending for their catalog by calling 1-800-221-0262. (I am not being paid to advertise them).

1 comment:
Amazing! It's such a laborious work for you to do.Still you deal with art and it must give you much inspiration.Thanks for intresting information!
Post a Comment